Decoding Bike Inner Tube Replacement: A Simple Guide
When the dreaded flat finally shows up on a sunny ride, knowing how to replace a bike inner tube can save you a lot of time and frustration. This guide walks you through each step, from locating a puncture to sealing and re‑inflating a brand‑new tube. Whether you’re a weekend hiker or a daily commuter, mastering this skill makes your bike feel brand‑new again.
Bike Inner Tube Replacement Basics
First, identify the type of tube you need: clincher, tubeless, or tubular. Clincher tubes are the most common for road and hybrid bikes, while tubeless setups are popular in gravel and mountain biking. Tubular tubes, used mainly in racing, require a different process. Knowing which kind you’re dealing with determines the tools and method you’ll use.
Gather the essentials: a spare tube that matches the tire size, a tube repair kit, a pump or CO₂ inflator, and a tire lever set. If you’re in a pinch, most bike shops sell quick‑replace tubes that fit standard 700C and 26‑inch tires.
Step‑by‑Step Replacement Process
1. Remove the wheel. Use the brake calipers or quick‑release lever to take the wheel off the frame. Lay the bike flat or mount it on a stand so you can work comfortably.
2. Deflate the old tube. Push out the valve stem to release all air, then press the valve’s pin to let any remaining pressure escape.
3. Take the tire off the rim. Insert a tire lever under the bead (the part that sits on the rim) and hook it onto the rim’s edge. Slide a second lever a few inches away to lift the second side of the tire. Gently wiggle the tire off the rim, working around the rim to free the entire bead.
4. Locate the puncture. Once the tire is off, pull the tube out and roll it with a thumb to feel for any sharp objects or rough spots. Mark the area with a pen if you need to keep track.
5. Inspect the rim. A clean rim ensures a good seal. Use a rag or a rim brush to remove any burrs, tape, or debris. This step prevents future flats.
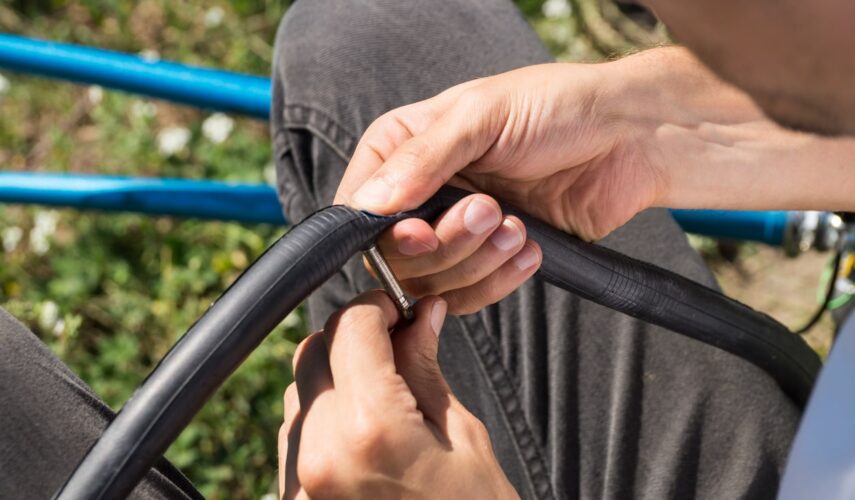
6. Insert the new tube. Before inserting, inflate the tube slightly so it keeps its shape. Insert the valve stem into the rim’s valve hole, then tuck the tube into the tire, making sure it doesn’t twist. Work the tube around the rim, checking that the valve stays straight.
7. Re‑mount the tire. Starting opposite the valve, use the tire lever to push the bead back onto the rim. Work slowly, alternating levers, until both sides of the tire are seated. Avoid pinching the tube with the lever; use a gentle, even pressure.
8. Inflate to proper pressure. Check the tire sidewall for the recommended PSI range, then inflate using your pump or CO₂ cartridge. Verify the tire sits evenly around the rim.
9. Re‑attach the wheel. Slide the wheel back onto the frame, ensure it’s centered, and secure the quick‑release or axle nuts. Reapply brake pads if they’ve shifted.
Tips for a Smooth Replacement
- Use a new valve cap. After replacement, replace the valve cap to keep dust out.
- Check for multiple punctures. If you find more than one hole, consider a different tube brand or a puncture sealant for added protection.
- Practice on a spare tire. Before a long ride, try the process on a spare or a bike that’s not on a tight schedule.
- Carry a spare tube in the bag. Especially on long rides, a spare tube can be a lifesaver.
Common Mistakes to Avoid
Many riders forget to check the rim for sharp edges or fail to seat the bead properly, causing leaks. Additionally, using the wrong tube size can lead to a tire that sits too tight or too loose. Always double‑check the diameter and width listed on the tube and tire sidewall.
When to Seek Professional Help
If you encounter a cracked rim, a severely damaged tire, or a tubeless system that’s bleeding air, it’s best to head to a bike shop. Professional mechanics have the specialized tools to fix or replace these parts safely.
Frequently Asked Questions
Q1: Can I use a tubeless sealant on a clincher tube?
A1: Sealants are designed for tubeless rims. For clincher tubes, you’ll need a puncture repair kit that includes patch tape and a sealant for the tube itself.
Q2: How often should I replace my inner tubes?
A2: Roughly every 4,000–5,000 miles, depending on road conditions and tire wear. If you notice frequent punctures, consider upgrading to a puncture‑resistant tube.
Q3: Is it safe to reuse a tube after a single flat?
A3: Yes, as long as the tube isn’t visibly damaged. Remove any embedded debris and check the tube for thinning or cuts before re‑installing.
With this straightforward approach, you’ll quickly master bike inner tube replacement and get back to enjoying the road or trail without a hitch.