How to Boost Your HP 245 G7 with a Step‑by‑Step SSD Upgrade
If you’ve been waiting for your HP 245 G7 Notebook PC to catch up with modern workloads, the most effective shortcut is to upgrade HP 245 G7 notebook PC with SSD. Swapping the stock hard drive for a solid‑state drive can shave minutes off boot time, make everyday apps feel snappier, and extend the laptop’s useful life without breaking the bank. Below is a practical guide that walks you through everything you need to know before you open the case.
Why Upgrade HP 245 G7 Notebook PC With SSD?
Even though the HP 245 G7 ships with a conventional 5400 rpm HDD, the chassis itself was built around a standard 2.5‑inch SATA interface. That means you can slot in an SSD of almost any capacity, and the operating system will immediately recognize it. The benefits are threefold:
- Speed. Sequential read/write rates on a typical SATA SSD exceed 500 MB/s, dwarfing the sub‑100 MB/s performance of the original drive.
- Reliability. SSDs have no moving parts, so they’re less vulnerable to drops, bumps, and everyday wear.
- Battery life. Because SSDs draw less power, you’ll often notice a modest improvement in runtime.
All of these gains come without needing to replace the entire laptop, making the upgrade a cost‑effective performance boost.
Checking Compatibility Before You Buy
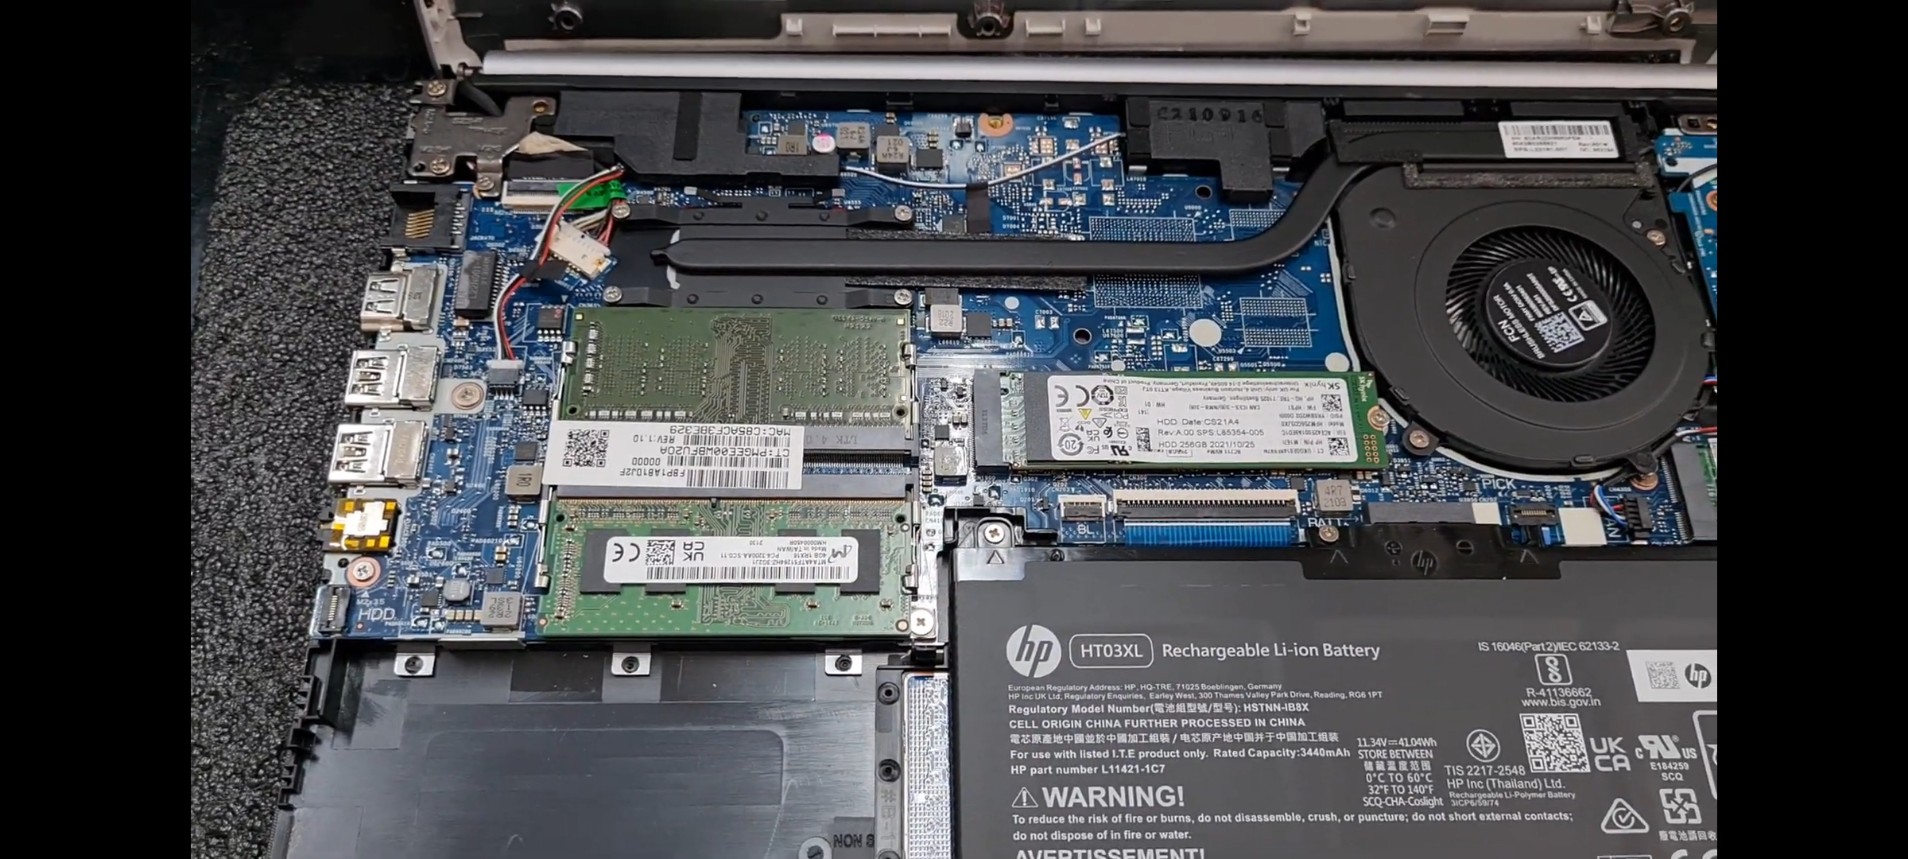
The HP 245 G7 supports a single 2.5‑inch SATA drive bay. Some configurations also include an empty M.2 slot, but that slot is limited to SATA‑based M.2 SSDs rather than the faster NVMe type. To avoid surprises, confirm the following:
- Form factor: 2.5‑inch SATA III (or M.2 SATA if you prefer the smaller card).
- Interface: SATA III (6 Gb/s) – the laptop’s SATA controller caps at this speed.
- Height clearance: Most 2.5‑inch drives are 7 mm thick, which fits comfortably inside the chassis.
When in doubt, glance at the service manual (HP provides a PDF on its support site) or open the bottom panel to verify the existing drive’s dimensions.
What You’ll Need
- Phillips #0 screwdriver – the screws on the bottom cover are small.
- Anti‑static wrist strap (optional but recommended).
- Your new SSD – 250 GB is a practical minimum for Windows 10/11, but 500 GB or 1 TB gives plenty of breathing room.
- Cloning software (e.g., Macrium Reflect Free) if you plan to copy the old drive.
- USB‑to‑SATA adapter – handy for cloning before the physical swap.
Step‑by‑Step Installation Guide
1. Prepare Your Workspace
Turn off the notebook, unplug the power brick, and disconnect any peripherals. Place the laptop on a clean, static‑free surface, and attach the anti‑static strap to a grounded object.
2. Remove the Bottom Cover
Flip the laptop over and locate the eight screws securing the lower panel. Carefully loosen each one, keeping track of their positions – they’re often of different lengths. Gently pry the panel away with a plastic spudger; it should lift without excessive force.
3. Locate the Existing Drive
Behind the cover you’ll see a metal caddy holding the hard drive. It’s typically secured with one or two tiny screws and a SATA connector. Disconnect the SATA cable by pulling it straight out.
4. Transfer the Caddy (Optional)
If you prefer to keep the original caddy, unscrew the drive from it, then slide the SSD into the same slot. Most SSDs fit snugly; just ensure the connectors line up.
5. Install the New SSD
Place the SSD into the bay, re‑attach the SATA connector, and secure the drive with the previously removed screws. Double‑check that the drive sits flat and the connectors are fully engaged.
6. Reassemble the Laptop
Replace the bottom panel, reinstall all screws in their original spots, and flip the laptop back over. Reconnect the power adapter and turn the machine on.
7. Boot Into BIOS (If Needed)
On first power‑up, press Esc then F10 to enter the BIOS. Verify that the SSD appears as the primary boot device and that the SATA mode is set to AHCI – this setting maximizes SSD performance.
Cloning vs. Fresh Install: Which Path Is Right?
If you want to keep your existing Windows installation, use a cloning tool. Connect the old HDD to a USB‑to‑SATA adapter, run the cloning software, and copy the entire system partition to the new SSD. After the clone finishes, swap the drives as described above and boot from the SSD.
Alternatively, a fresh Windows install can eliminate legacy bloat and ensure the best possible performance. In that case, back up your personal files, create a bootable USB installer (Microsoft’s Media Creation Tool works well), and install Windows directly onto the SSD. Remember to download the latest drivers from HP’s support page – especially the chipset and storage controller drivers.
Post‑Installation Tweaks
Once Windows is running, a few adjustments can squeeze out extra speed:
- Enable TRIM if it isn’t already on (run
fsutil behavior query DisableDeleteNotifyin Command Prompt; a result of0means it’s active). - Turn off Superfetch and Prefetch – modern SSDs render these services unnecessary.
- Adjust the Power Plan to “Balanced” or “High performance” to prevent the drive from throttling.
- Run a quick
chkdsk /fto verify the file system’s integrity.
Troubleshooting Common Issues
If the laptop fails to recognize the SSD, double‑check the SATA connector for dust or bent pins. Some users report that the BIOS needs a simple “Reset to Defaults” after an SSD swap. In rare cases, a firmware update for the laptop’s BIOS resolves compatibility quirks with newer SSD models.
Should Windows refuse to boot, ensure the SSD is listed first in the boot order and that the Secure Boot setting isn’t blocking unsigned drivers – toggling it off temporarily can help.
Frequently Asked Questions
Can I keep the original HDD as extra storage?
Yes. The HP 245 G7 has a secondary 2.5‑inch bay in some configurations; if yours does not, you can use an external USB‑3.0 enclosure to retain the HDD for backups or media.
What SSD capacity is sensible for everyday use?
A 500 GB drive comfortably holds the OS, applications, and a reasonable amount of personal files. For heavy media libraries, 1 TB offers a safe cushion without a steep price jump.
Will installing an SSD void my warranty?
HP’s warranty generally covers internal components, but opening the case may be considered a user‑initiated repair. Check the warranty terms; many users report that the warranty remains intact as long as no damage occurs during the upgrade.
Do I need to reinstall software after cloning?
No. Cloning copies the entire OS, drivers, and installed programs, allowing you to resume work exactly where you left off. A fresh install, however, may require reinstalling applications.