How to Fix a Loose Front Sprocket on Your Motorcycle
Noticing a wobble in the chain or hearing that familiar clank while you’re riding? Chances are the front sprocket has loosened, and ignoring it can lead to rapid wear or even a sudden loss of drive. Fortunately, tightening or replacing a front sprocket is a task most riders can handle with a few tools and a bit of patience. Below is a practical, step‑by‑step guide that walks you through the whole process—from safety checks to the final test ride.
Why a Loose Front Sprocket Is a Problem
The front sprocket is the anchor point for your drive chain, transmitting power from the engine to the rear wheel. When it’s loose, the chain can skip teeth, causing uneven tension, premature chain stretch, and noisy operation. In extreme cases the chain may even derail, leaving you stranded or forcing a dangerous emergency stop. Regularly inspecting the sprocket can save you money on parts and keep the ride smooth.
Gather the Right Tools and Safety Gear
- Basic socket set (typically 10 mm or 12 mm for most bikes)
- Torque wrench – to hit the manufacturer’s specified tightness
- Allen keys – many bikes use hex bolts on the sprocket carrier
- Chain breaker or master link tool – only if you need to remove the chain
- Clean rags and a gentle degreaser – for removing old oil and grime
- Safety glasses and gloves – protect eyes and hands while you work
Having everything at hand prevents the need to stop mid‑repair for a missing piece, which can be frustrating when you’re working in a cramped garage or on a roadside stand.
Step‑by‑Step Repair Process
1. Secure the Motorcycle
Place the bike on a center stand or a sturdy paddock block. If you’re using a stand, make sure the rear wheel is lifted enough to give you clear access to the front sprocket without the chain sagging excessively.
2. Inspect the Sprocket and Chain
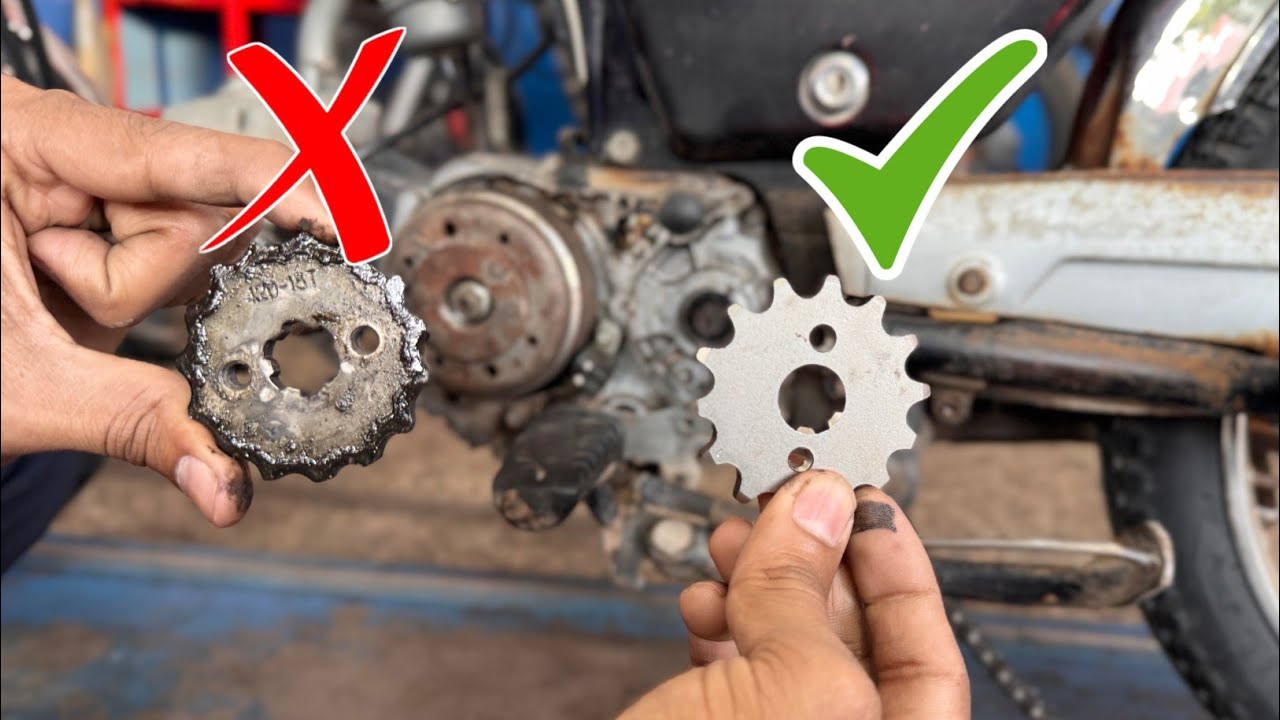
Rotate the front wheel by hand and watch the chain’s motion. Look for any play in the sprocket carrier, worn teeth, or excessive chain slack. If the sprocket teeth are chipped or the chain shows “kinking,” you might need a replacement rather than just a tightening.
3. Loosen the Rear Wheel (Optional)
Some models make it easier to access the front sprocket by loosening the rear axle a half‑turn. This relieves tension on the chain, letting the sprocket spin freely while you work. Keep the axle nut within reach; you’ll need to retighten it later.
4. Remove the Sprocket Cover (If Present)
Many bikes have a plastic or metal cover protecting the sprocket bolts. Use the appropriate socket or screwdriver to pop it off. Set the cover aside; you’ll snap it back on once the job is done.
5. Tighten the Sprocket Bolts
Locate the bolts that clamp the sprocket to the swingarm. Using a socket or Allen key, turn each bolt a quarter turn clockwise, moving in a criss‑cross pattern. This ensures even pressure across the sprocket body. When the bolts feel snug, grab your torque wrench and apply the manufacturer’s torque rating—usually somewhere between 20 and 35 Nm for sport bikes, but always double‑check the service manual.
6. Re‑check Chain Alignment
With the bolts properly torqued, align the chain by adjusting the rear axle if you previously loosened it. Most bikes have a chain adjuster on either side of the swingarm; turn it until the chain sits midway between the inner and outer sprocket teeth. Tighten the rear axle nut to spec, then re‑measure the chain slack—typically 20‑30 mm of vertical movement at the midpoint of the swingarm.
7. Re‑install the Cover and Clean Up
Snap the sprocket cover back into place, wipe away any excess grease with a rag, and give the whole area a quick spray of degreaser to remove old lubricant. A clean surface helps prevent future corrosion.
8. Test Ride and Listen
Start the engine, let it idle, and watch the chain for any abnormal movement. Then take the bike for a short ride, listening for rattles or clicks. If everything feels tight and the chain runs smoothly, you’ve successfully fixed the loose front sprocket.
After‑Repair Maintenance Tips
Even after a perfect repair, regular maintenance can catch issues before they become serious. Check the sprocket bolts at least once a month, especially after long rides or when riding on rough terrain. Lubricate the chain with a quality chain lube after each ride, and inspect the rear sprocket for wear at the same time. If you notice any persistent play, it may be time to replace the front sprocket carrier rather than just retightening the bolts.
Common Pitfalls to Avoid
- Over‑tightening bolts – can strip threads or crack the swingarm.
- Ignoring chain wear – a stretched chain will keep the sprocket loose despite proper bolt torque.
- Skipping the torque check – hand‑tightening feels fine but rarely reaches the spec.
- Riding with a dirty chain – grit can grind the sprocket teeth and cause premature loosening.
By staying mindful of these mistakes, you’ll keep the front sprocket—and the whole drivetrain—in good shape for many miles ahead.
Frequently Asked Questions
What torque value should I use for the front sprocket bolts?
Torque specifications vary by make and model. Most sport‑bike manufacturers recommend 20‑35 Nm, but you should consult your owner’s manual for the exact figure.
Can I ride with a slightly loose front sprocket for a short distance?
It’s best to avoid riding at all if the sprocket shows any play. Even a brief ride can cause the chain to skip, leading to sudden loss of power or damage to the teeth.
How often should I inspect the front sprocket?
Inspect it during every routine chain check—typically every 500 km (or about every 300 miles). If you ride on dusty or wet roads, increase the frequency.
Do I need to replace the chain when I fix a loose sprocket?
Not necessarily. If the chain is still within its wear limits (usually measured by a chain stretch gauge), you can keep it. However, a severely stretched or rusted chain should be replaced alongside the sprocket for optimal performance.