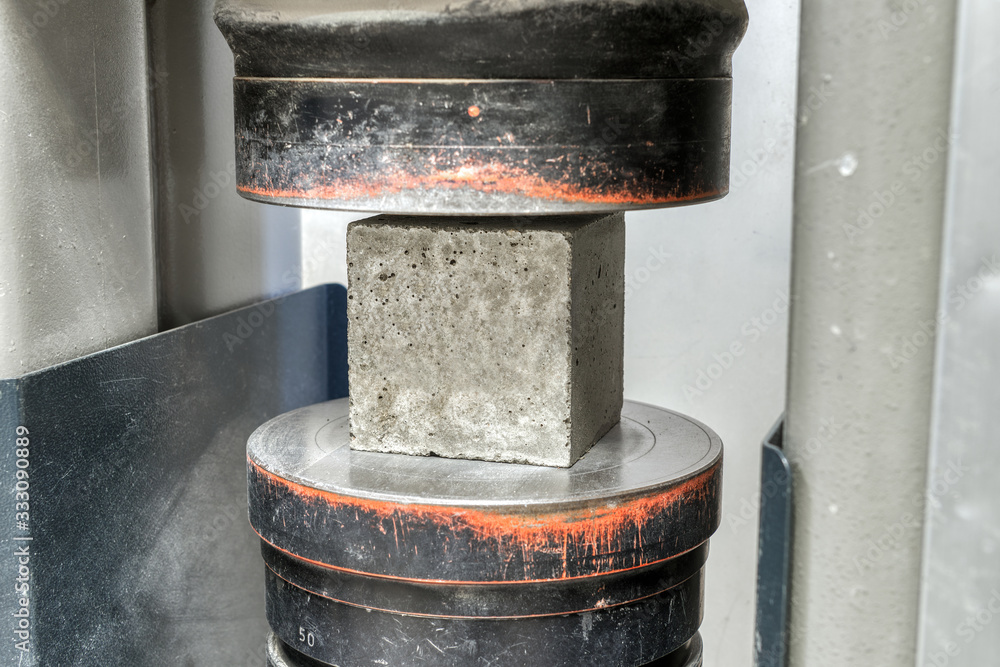
How to Test Concrete: The Cube Compressive Strength Guide
The Cube Concrete Compressive Strength Test is a cornerstone of quality control in construction. When you set out to verify that a batch of concrete meets design specifications, you’re not just checking numbers—you’re ensuring safety, durability, and cost‑effectiveness. This guide walks you through every step, from sample preparation to interpreting results, so you can confidently bring the lab into the field.
Why the Cube Test Matters
Concrete behaves differently than many other construction materials. Its strength grows over time, and environmental factors can accelerate or impede that growth. The cube test offers a simple, repeatable method to quantify compressive strength at a given age. Architects, engineers, and contractors use these numbers to:
- Validate mix designs and adjust proportions on the fly.
- Demonstrate compliance with local building codes and international standards like ASTM C39.
- Identify potential quality issues—such as improper curing, segregation, or oversized aggregates—before they become structural problems.
Preparing the Sample
1. Mix Design and Batch Control
Start with a well‑balanced mix: cement, water, aggregates, admixtures, and air entrainment. Keep a record of the water‑cement ratio, aggregate gradation, and any additives. Consistency here directly influences test reliability.
2. Forming the Cubes
Cubes are typically 150 mm (6 in) on each side, though other sizes (e.g., 100 mm or 200 mm) are acceptable if specified. Use high‑strength steel molds to prevent deformation during curing. Fill molds in layers—no more than 50 % of the mold height per layer—to avoid segregation.
3. Consolidation
After each layer, use a tamping rod or vibration table to remove entrapped air. A uniform, dense matrix is crucial; any voids will lower the measured strength.
4. Demolding and Curing
Remove cubes from molds after 24 hours, rinse, and seal them with plastic or a curing compound. Maintain a relative humidity above 95 % and a temperature of 20 ± 5 °C until testing. Common curing methods include water baths, steam, or curing blankets—choose based on project constraints.
Equipment You’ll Need
- Standardised compression testing machine with a load cell rated for at least 500 kN.
- Cube holders and alignment tools to ensure uniform loading.
- Data acquisition system for real‑time recording of load and displacement.
- Temperature and humidity monitors to verify curing conditions.
Executing the Test
1. Loading Procedure
Place the cube in the testing rig, align it centrally, and apply load at a constant rate of 0.5–2 kN/s, depending on the machine’s capacity. Record the peak load before any sudden drop, which signals failure.
2. Calculating Compressive Strength
Compressive strength (fc) is calculated by dividing the peak load by the cube’s cross‑sectional area:
fc = (Peak Load) / (Area)
For a 150 mm cube, the area is 0.0225 m², so a 100 kN peak load yields 4.44 MPa.
3. Recording and Reporting
Document the cube ID, test date, environmental conditions, and any anomalies. Compare results against the target strength specified in the design. If multiple cubes were tested, calculate the average and the coefficient of variation to gauge consistency.
Interpreting the Results
A single cube reading isn’t the whole picture. Use statistical analysis to assess batch quality:
- Average compressive strength: Should match or exceed the design value.
- Coefficient of variation (COV): A COV below 10 % indicates good consistency; higher values suggest mix or curing issues.
- Trend over ages (7, 14, 28 days): Strength should increase progressively; any plateau may hint at curing problems.
When results fall short, trace back to potential causes: low water‑cement ratio, coarse aggregates, insufficient curing, or incorrect admixture dosage.
Common Pitfalls and How to Avoid Them
- Under‑cured samples: Always check the temperature and humidity logs. Even brief deviations can reduce strength by 10 % or more.
- Improper loading alignment: Misaligned load can produce artificial spikes. Use the built‑in alignment sensors or manual checks.
- Inconsistent mix: Document batch numbers and use calibrated scales. Small deviations can lead to significant strength differences.
- Neglecting sample storage: Store cubes in a dry, temperature‑controlled environment until testing. Moisture absorption or dehydration will skew results.
Safety Considerations
While the test itself is low‑risk, ensure:
- Testing equipment is certified and calibrated.
- Operators wear protective gear—gloves, safety glasses, and hearing protection if the machine is loud.
- Cubes are handled carefully to avoid crushing injuries; use lifting aids for larger specimens.
Frequently Asked Questions
Q1: Can I use a different cube size for my project?
A1: Yes. ASTM C39 allows cubes of 100 mm, 150 mm, or 200 mm. Just ensure you adjust the calculation for the new area and confirm that the chosen size meets your structural and code requirements.
Q2: How often should I perform the cube test during a large concrete pour?
A2: For critical structures, sample at least two cubes per 200 m³ of concrete. For non‑critical applications, a single cube may suffice. Always sample when there’s a change in mix design, batching, or environmental conditions.
Q3: What if the measured strength is lower than expected?
A3: Investigate the mix, curing, and test conditions. Check water‑cement ratio, aggregate grading, and admixture usage. If the problem persists, consider adjusting the mix or improving curing protocols.
Q4: Is a water curing bath better than air curing?
A4: Water curing baths maintain constant moisture and temperature, producing more uniform strengths. However, they require more resources. For most field projects, sealed plastic or a curing compound is adequate if humidity is kept high.
Mastering the cube compressive strength test equips you with a reliable benchmark for concrete quality. By adhering to standardized procedures and staying vigilant about potential errors, you can deliver safer, more durable structures—one cube at a time.