How to Replace Your Mazda Miata Side Mirror in 5 Easy Steps
Mazda Miata Mirror Replacement: What You Need to Know
If your Miata’s driver‑side or passenger‑side mirror is cracked, foggy, or simply stopped working, you don’t have to schedule a shop visit. A Mazda Miata mirror replacement can be tackled in a Saturday morning with a few common tools and a little patience. This guide walks you through the process, highlights safety tips, and points out the little quirks that often trip up first‑time DIYers.
Gather the Right Tools
- Flat‑head screwdriver or plastic trim removal tool
- Phillips screwdriver (usually #2)
- Torx T20 bit (some later models use T25)
- 12‑V socket set or wrench for the mounting bolt
- New mirror assembly (OEM or reputable aftermarket)
- Protective gloves and safety glasses
Having everything at hand prevents the need to pause mid‑project and search for a missing piece.
Step 1: Prepare the Car
Park the Miata on a flat surface, engage the parking brake, and disconnect the battery. Removing the negative terminal eliminates the risk of accidentally short‑circuiting the power‑fold or turn‑signal wires embedded in the mirror housing.
While the battery is out, tilt the mirror upward to expose the mounting bolts. This small adjustment makes the screws more accessible and reduces the chance of stripping them later.
Step 2: Remove the Interior Trim
Inside the door, locate the plastic trim that covers the mirror’s mounting screws. Use a flat‑head screwdriver wrapped in a cloth or a dedicated trim tool to pry the piece gently away. The clip should pop free with a soft “click.”
Once the trim is off, you’ll see two or three bolts securing the mirror to the door frame. Keep the bolts in a small container; they’re easy to lose in the engine bay.
Step 3: Disconnect the Wiring
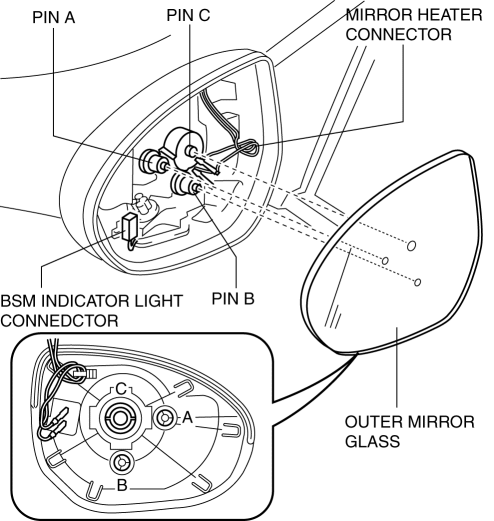
If your mirror is power‑adjustable, heated, or has integrated turn signals, a wiring harness will be attached. Press the release tab on the connector and pull it straight out. A quick visual check confirms the connector is fully disengaged before you pull the mirror away.
Tip: label the connector with a piece of masking tape if you’re worried about orientation. Most Miata mirrors are symmetrical, but a mislabeled plug can cause a headache later.
Step 4: Remove the Old Mirror
Using the appropriate Torx or socket, loosen the mounting bolt(s). The mirror may still be snug against the door due to the rubber seal, so a gentle wiggle helps free it. Once the bolt is removed, guide the mirror outward, being careful not to damage the paint.
Set the old mirror aside. If you notice corrosion on the bolt threads, clean them with a wire brush before installing the new unit.
Step 5: Install the New Mirror
Position the replacement mirror against the door, aligning the bolt holes. Insert the mounting bolt and tighten it just enough to hold the mirror in place—over‑torquing can crack the housing.
Reconnect the wiring harness, ensuring the clip clicks securely. Snap the interior trim back on, and give the mirror a gentle tug to confirm it’s firmly seated.
Finally, reconnect the battery, start the engine, and test all functions: manual adjustment, power folding, heating, and any integrated signals. If something feels off, double‑check the connector and bolt tightness.
Common Pitfalls and Pro Tips
Corroded bolts. Older Miatas, especially those exposed to salty roads, often have rusted mounting bolts. A penetrating oil applied a few minutes before removal can make a big difference.
Paint protection film (PPF). If you have PPF on the door, be sure the trim removal tool doesn’t lift the film, as it can tear and ruin the finish.
Heat‑related failures. Mirrors with heating elements sometimes develop a broken filament. Replacing the whole assembly is usually cheaper than attempting a repair, but a quick visual inspection can confirm the fault.
When to Call a Professional
Most owners can complete a Mazda Miata mirror replacement with basic tools, but a few scenarios merit a visit to a qualified mechanic: extensive rust that compromises the mounting points, a broken door latch that prevents trim removal, or an aftermarket mirror that requires custom wiring.
In such cases, a professional can ensure structural integrity and maintain the vehicle’s resale value.
FAQ
Do I need special tools for a Miata mirror swap?
Most of the job can be done with a standard screwdriver set and a Torx bit (usually T20). A trim removal tool helps protect the interior plastic, but a wrapped flat‑head works in a pinch.
Can I replace the mirror myself, or is a shop required?
For a typical bolt‑on mirror, a DIY approach is perfectly safe. Only consider a shop if the mounting bolts are seized or the door’s interior trim is damaged.
How much does a replacement mirror cost?
OEM mirrors run between $150 and $250, while quality aftermarket options can be found for $80‑$130. Prices vary with features such as heating or integrated turn signals.
What should I watch for after installing the new mirror?
Check that the mirror stays aligned, the power functions operate smoothly, and there are no unusual noises when folding or heating. A loose bolt will usually manifest as wobble or rattling.